Salesforce web form
💪 Salesforce is a powerful CRM platform that allows you to create and manage your database of contacts, leads, and customers.
📈 Salesforce web forms are an excellent way to collect data from visitors on your website or from leads. They can be used for lead generation, auto case creation, appointment booking, surveys, event registration, etc. Salesforce has a wide variety of pre-built templates that are ready to use with minimal customization needed 👏.
For example, a visitor can provide their 📝 Name, 📧 Email, and 🏭 Company name through a web form, which can then create a 🚀 Lead record in Salesforce. Similarly, a customer can provide 📝 ticket information through a web form to generate a 🔧 support case in Salesforce.
Web forms can be created and customized within Salesforce using pre-built templates or by creating a form from scratch. Once a web form is created, it can be embedded on a website or linked to from an email or social media post.
Use of Salesforce web form
Forms are a simple and effective way to collect information 📚 from visitors on a website. They are particularly useful for gathering more information from visitors who may be hesitant to provide their email addresses.
Forms can also be used for authentication, requesting contact, 📱 or giving visitors the option to subscribe to a newsletter. In Salesforce, the collected data from forms can be used to create records, such as leads, cases or any custom object.
Some common uses of web forms:
Web To Lead Form Examples
- An e-commerce site collecting contact info through a pop-up form when users try to download an ebook. Data is sent to Salesforce leads.
- An enterprise software company offering a free trial sign-up form. User details are stored as leads to nurture sign-ups with demos and ongoing communication.
- An accounting firm embeds a “Request a Consultation” form on service pages so visitors can book calls with tax advisors. Meetings synced to reps’ Salesforce calendars.
Web To Case Examples
- An online retailer using a “Need Help Ordering?” web form so shoppers can get assistance from support reps. Cases auto-assigned for agent routing.
- A cloud storage provider creating a web form to submit technical issues. Users can provide system diagnostic info to help troubleshoot problems via cases.
- A SAAS application with an in-app feedback form to report bugs and other issues. Engineering uses cases to prioritize fixes based on customer input.
Types of web form in Salesforce
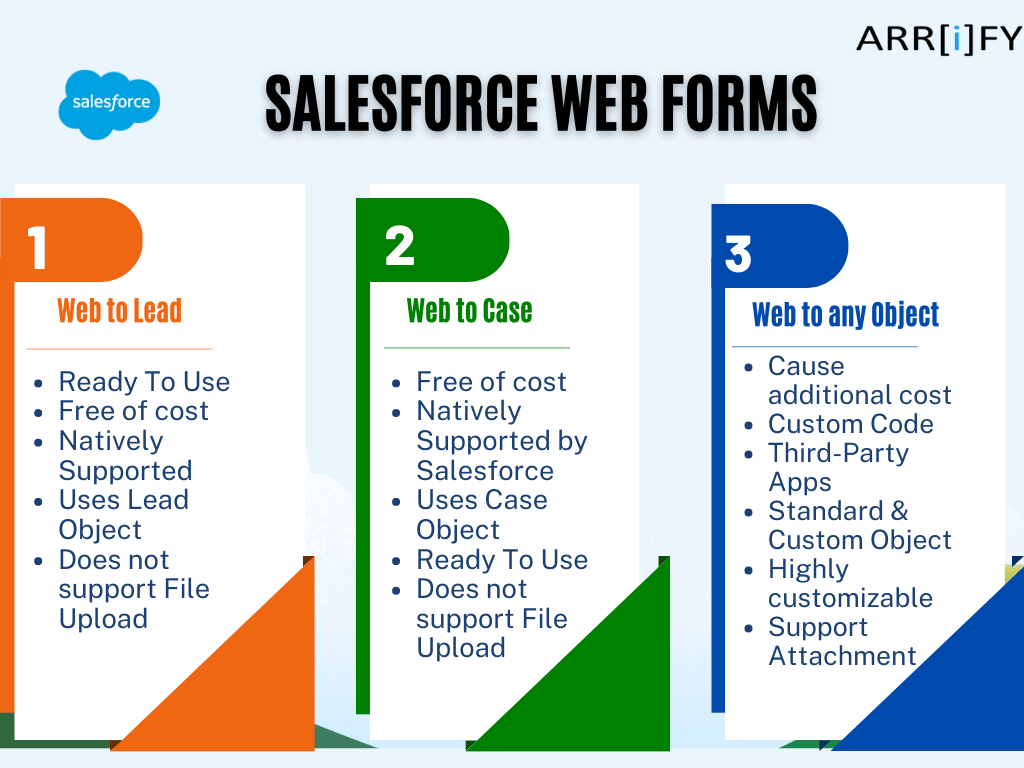
In Salesforce, there are several types of web forms that can be used to collect data from visitors or leads. These forms include:
Web To Lead forms are used to capture lead information from potential customers or clients. This information is stored in the Salesforce Lead object and can be used to nurture leads and move them through the sales process. Web To Lead forms can be created using Salesforce’s Web To Lead form builder or by using third-party apps.
Web To Case forms are used to create and manage support cases in Salesforce. They allow customers to submit requests for assistance or report issues, and the information is stored in the Salesforce Case object. Like Web To Lead forms, Web To Case forms can be created using Salesforce’s form builder or by using third-party apps.
Web To Any Object forms allow users to create web forms that capture data for any object in Salesforce, not just leads or cases. This can be useful for businesses that have custom objects in Salesforce and want to capture data from web forms directly into those objects. Web To Any Object forms can be created using Salesforce’s form builder or by using third-party apps.
In this article, we will discuss Web To Lead, Web To Case, and Web To Any Object in detail. Overall, web forms in Salesforce are a convenient and efficient way to collect and manage data from visitors or leads.
These webforms can be customized and tailored to the specific needs of the business, and can be used to create records for various objects (Standard and Custom) in Salesforce.
Web To Lead (web2lead) – Salesforce Web form for Lead
What is Web to Lead?
Web-to-lead (or say web to lead form) is one of the most essential Salesforce features. 🚀 The aim is to catch information filled by site guests, for example, contact information and product interest, and save it as a lead record in Salesforce for further processing.
Web-to-lead is just a process that allows Salesforce to pull data from your website forms into your Salesforce CRM.
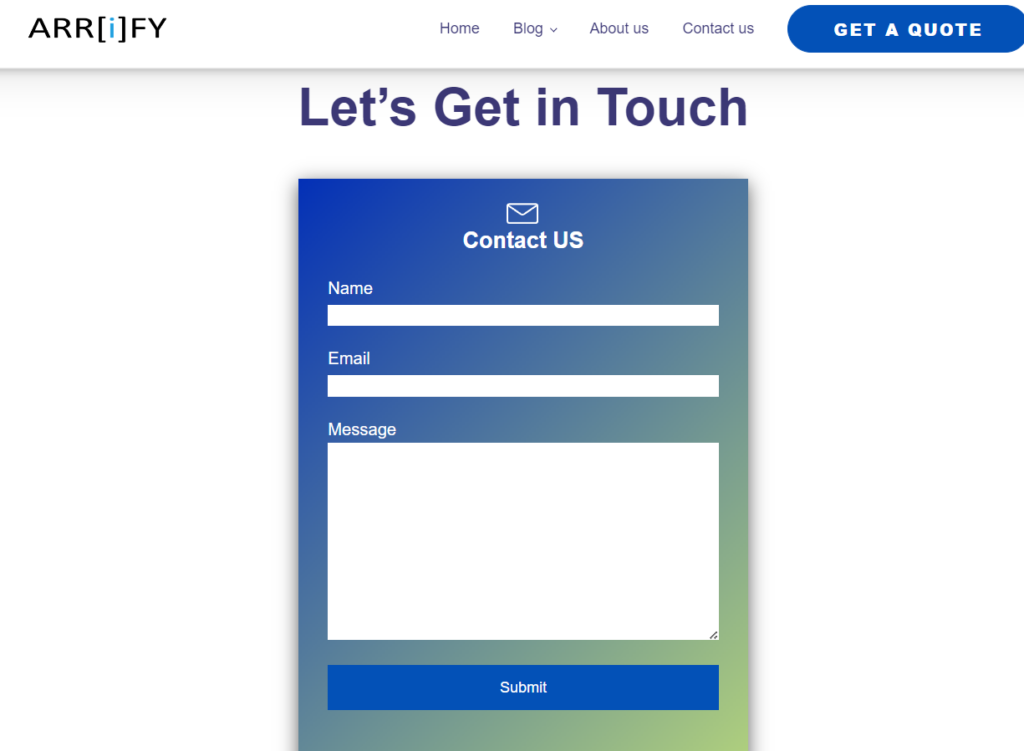
The form can be created (or generated) by using the web to Lead generator form in Salesforce and can be embedded in anywhere in the HTML webpage. Next we will show you how to create a web form for Lead in Salesforce with Web to Lead Form Generator and Embed Code on a web page.
How To Create Web To Lead
How to set up web to lead form in Salesforce?
Total Time: 10 minutes
-
Go to setup and search web to lead
Click on the “Setup” gear icon in the top right corner of your Salesforce dashboard. In the setup menu, type “web-to-lead” in the Quick Find search bar. Click on the “Web-to-Lead” option in the search results.
This will take you to the web-to-lead setup page, where you can configure and customize your web-to-lead forms. -
Click on create web to lead form
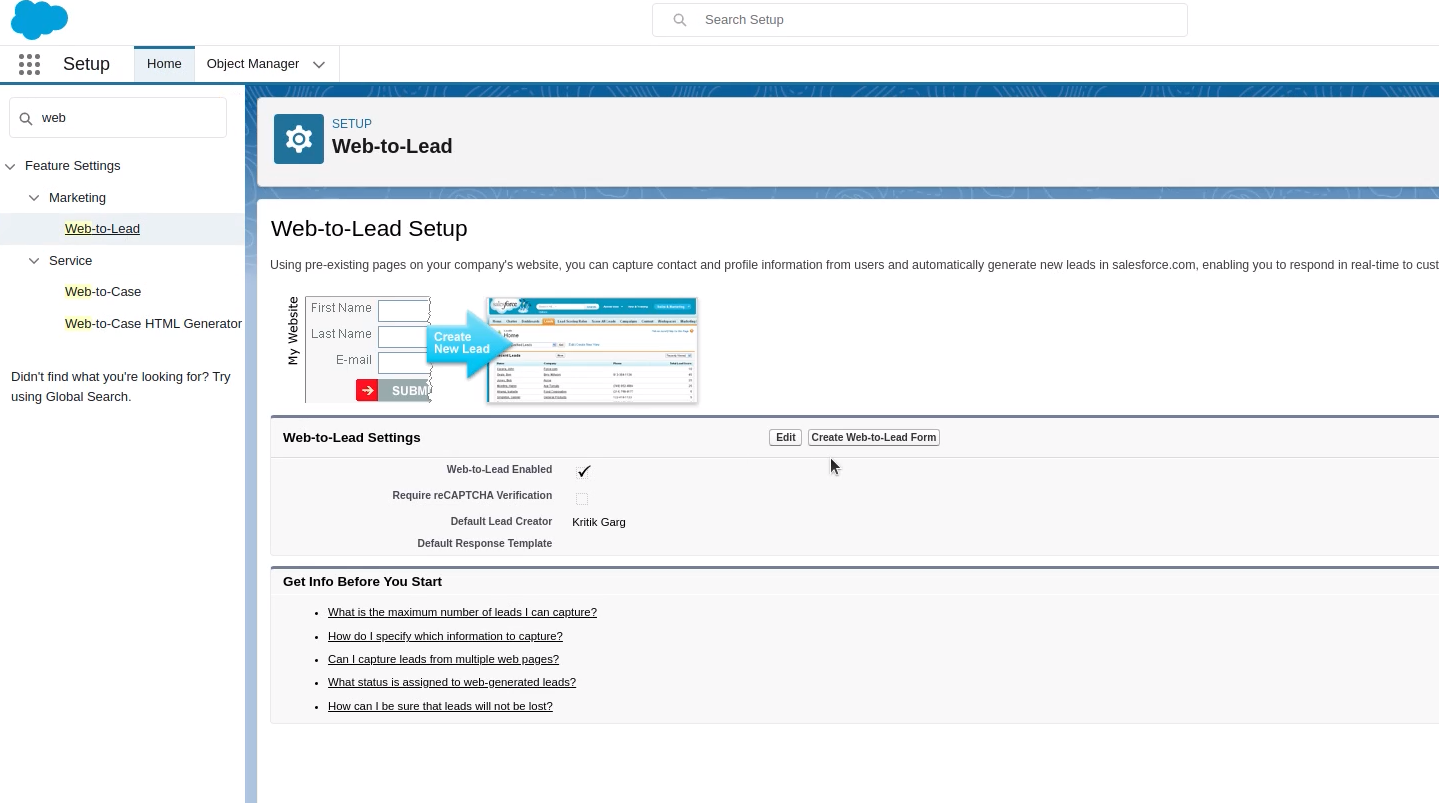
Click on the “Create Web-to-Lead Form” button.
Follow the prompts to customize your form, including adding or removing form fields, changing the order of form fields, or changing the content of form fields.
Provide a return URL.
Once you have finished customizing your form, click on the “Generate” button to generate the HTML code for the web form. -
Copy and paste the sample HTML
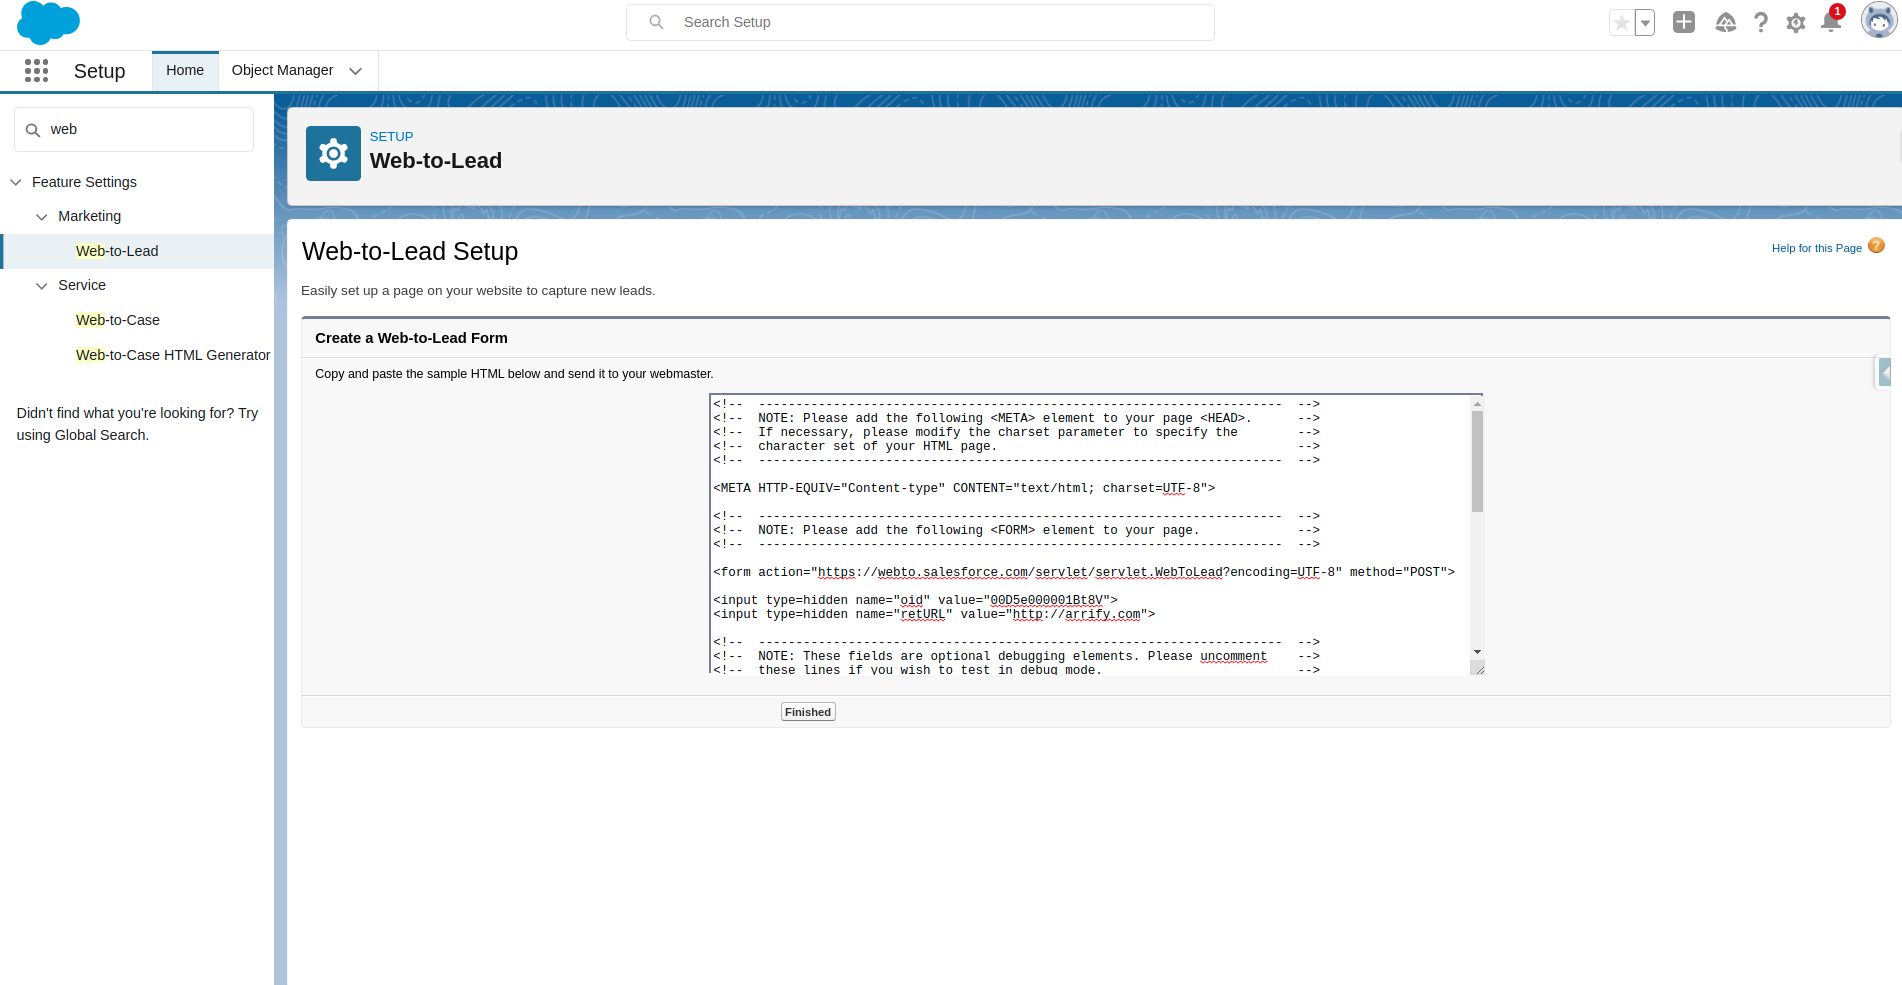
To add a web form to a website, you can copy and paste HTML code that creates the form and specifies where the form’s data should be submitted.
The code includes tags and attributes to create the form, input fields, and a submit button.
You can then customize the form to meet your specific needs. i.e. changing the form’s styling using CSS.
We are saving it as an HTML file. -
Open the file in the web browser
To use a web form, you will need to open the form in a web browser.
Simply fill out the form by typing in your details and then click the “submit” button or press the “enter” key on your keyboard.
Once you have submitted the form, you will be redirected to the specified “return URL,” which is the webpage or location that you specified in the form’s code.
This could be a thank-you page, a confirmation page, or another webpage where you can access additional information or resources. -
Go to lead Object and check the record
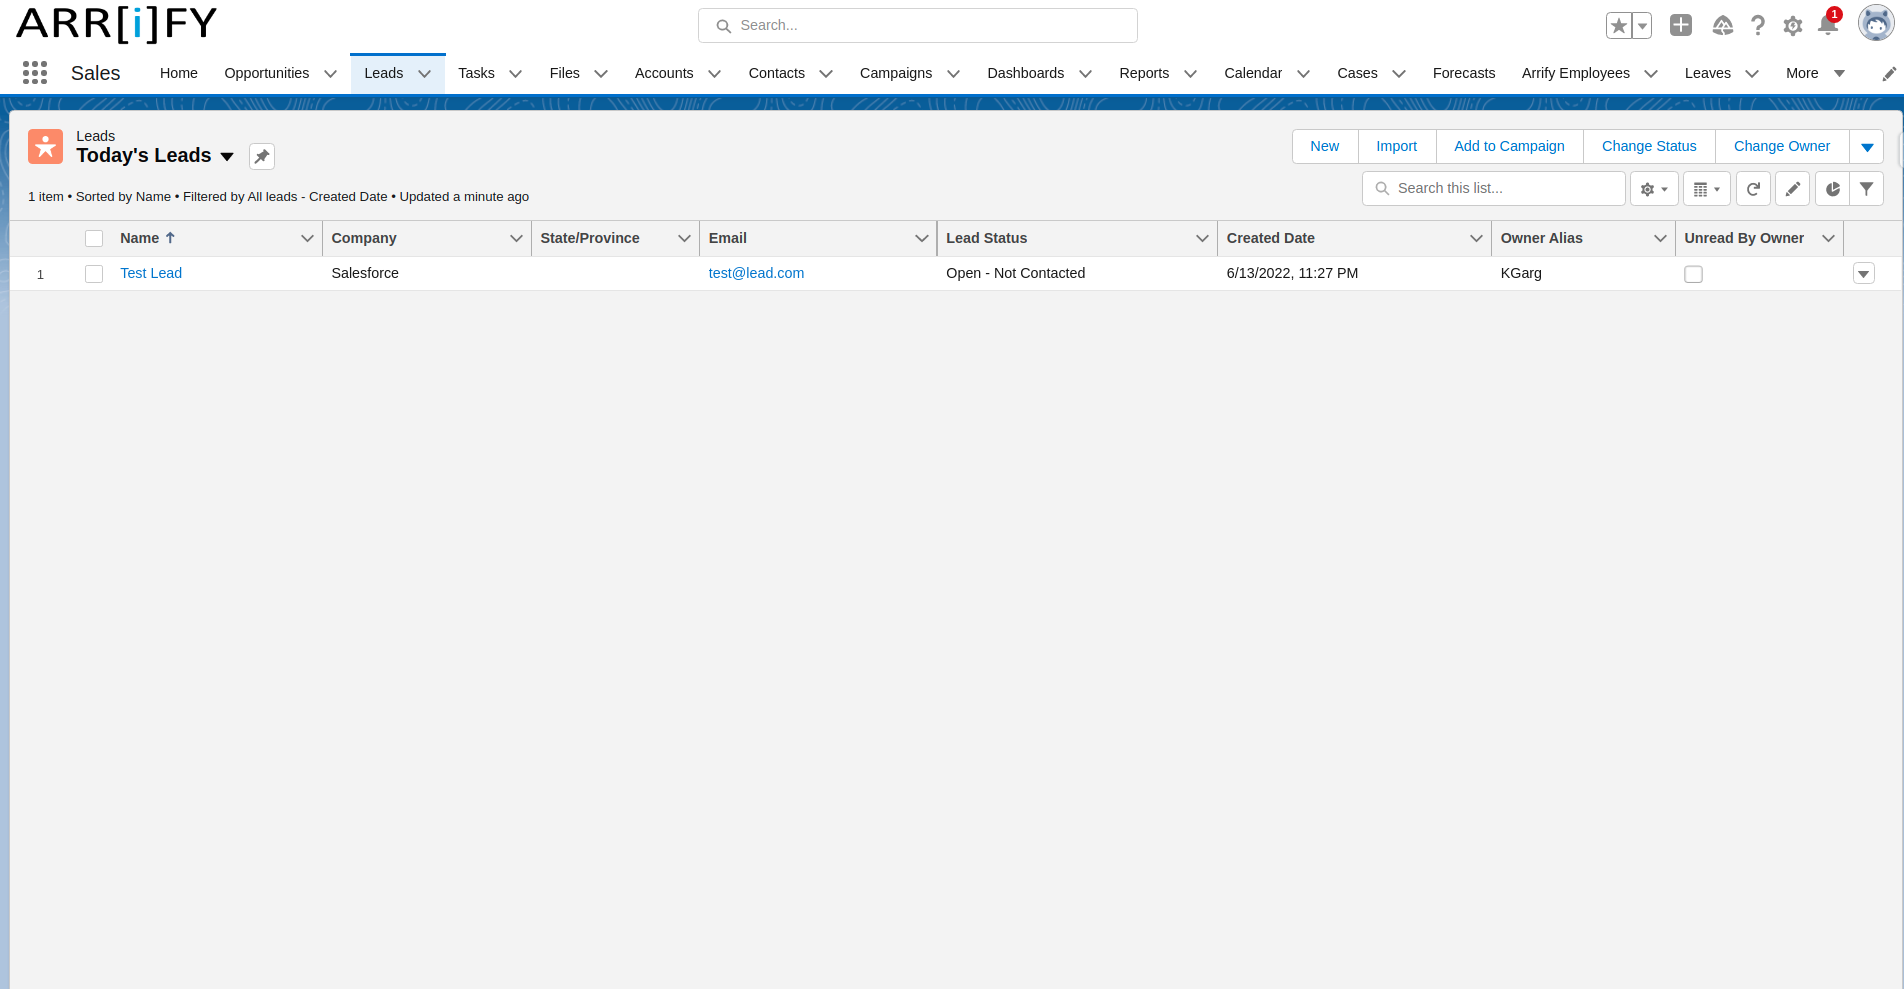
To verify that a record has been successfully created through a web form, you can check the relevant database or system where the record is stored. In the case you can check the “Leads” tab to see if the new record has been created.
Salesforce Trailheads for Web to Lead Form
Here are some Salesforce Trailhead modules that cover the web-to-lead and related feature:
Lead Generation for Marketers: Grow your business with lead generation.
Leads & Opportunities for Lightning Experience: Learn to power your sales process with leads and opportunities in Salesforce.Add to FavoritesAdd to TrailmixTags
Lead Nurturing Automation with MuleSoft Composer: Build and run a flow to sync leads in Google Sheets with Salesforce and Slack.Add to FavoritesAdd to TrailmixTags
Web to Case Form (web-to-case) : Salesforce Web form for Case
What is web-to-case
Salesforce web-to-case is a feature that allows you to create a web form on your website that allows visitors to submit support requests or issues to your organization. These requests are automatically converted into case records in Salesforce, which can then be assigned to support agents or other team members for resolution.
Web-to-case forms can be created and customized within Salesforce using pre-built templates or by creating a form from scratch. Once a web-to-case form is created, it can be embedded on a website or linked to from an email or social media post.
When a visitor submits a web-to-case form, their request is stored in Salesforce and can be used to create a case record. Web-to-case forms are a convenient and efficient way to collect and manage customer support requests in Salesforce.
Create web to case form

To set up a web-to-case form in Salesforce, follow these steps:
- Go to Setup > Customize > Cases > Web-to-Case.
- Click the “New” button to create a new web-to-case form.
- Enter a name and description for the form.
- Select a record type for the cases that will be created from the form submissions.
- Choose whether to enable rich text formatting for the form.
- Select the fields you want to include on the form, and drag and drop them to rearrange the order.
- Customize the form layout using the options provided.
- Set the form behavior, such as whether to send an email notification when a case is created from the form submission.
- Click the “Save” button to save the form.
- Click the “Get HTML” button to get the HTML code for the web form.
- Copy and paste the HTML code into the HTML of your website to embed the form.
That’s it! You have now set up a Salesforce web-to-case form on your website.
Using attachments with Salesforce web-to-case form
Salesforce web-to-lead forms do not support attachments by default, but there are a few workarounds you can use to allow visitors to attach files to their lead submissions. Here are two options:
- Use a Visualforce page with an iframe: This solution involves creating a Visualforce page that includes the standard web-to-lead fields, as well as an attachment upload capability.
The Visualforce page can then be embedded in a Salesforce Site and used as a web-to-lead form. When a visitor submits the form, a new lead record will be created in Salesforce with the attached files. - Use a platform API implementation: Another option is to use the Salesforce platform API to create a custom web-to-lead form that supports attachments.
This solution requires more development work, but it allows you to fully customize the form and integration with Salesforce. - Third-party form builder tools: There are many third-party form builder tools that can be used to create web forms that create case records in Salesforce with attachment. These tools often offer a user-friendly interface and may be easier to use for non-developers. However, they may come with additional costs or limitations compared to the web-to-case feature.
Keep in mind that both of these solutions may increase the size and complexity of the web-to-lead form, and may require additional development resources. You should carefully weigh the benefits and trade-offs of these approaches before implementing them.
Salesforce Web form for Any custom object
Salesforce does not have a built-in feature for creating public web forms, with the exception of web-to-lead and web-to-case forms.
However, there are other options available for Salesforce users who want to create public web forms. These options vary in terms of cost, manual effort required security, future-proofing, and flexibility. Some options to consider include creating custom code forms, using third-party apps or Apps from the AppExchange.
In this Web form guide, we will explain each, one by one.
Salesforce web form with Custom Code – No Reaccuring Cost
Salesforce allows users to create custom web forms using code. There are several features available for this purpose, such as Visualforce pages, Lightning Aura components, and Lightning Web components.
These features allow users to create web forms that are tailored to their specific business needs, and can be enhanced with Apex, HTML, CSS, and JavaScript to make them more accurate, optimized, responsive, and fast.
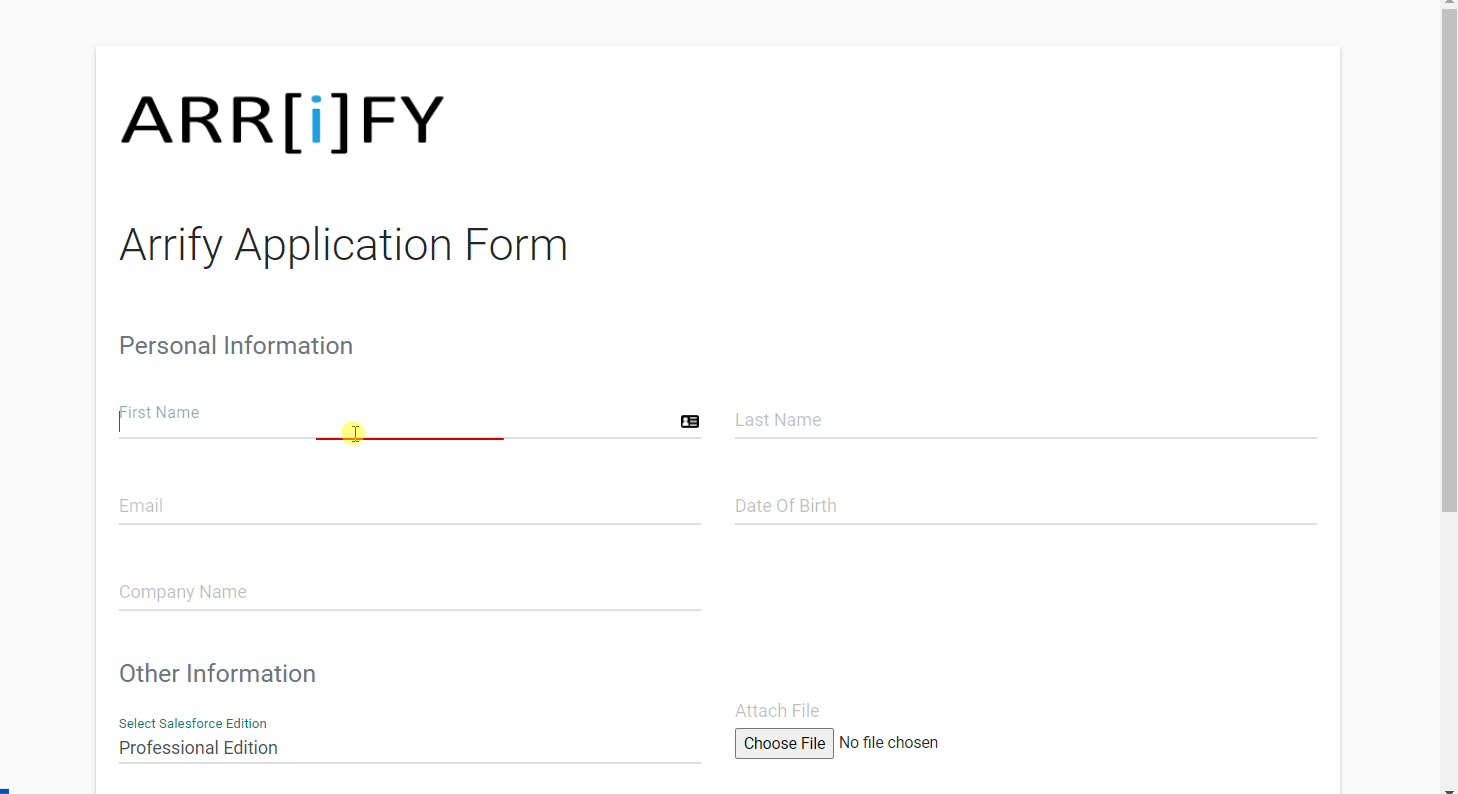
Custom code forms offer a high level of flexibility and customization, but may require more manual effort and may be more suitable for users with coding skills.
Benefits of using custom code forms in Salesforce:
Mobile-friendly: Code-based forms can be designed to work seamlessly on mobile devices.
Web forms for standard and custom objects: Custom code forms can be built for standard objects (such as leads or cases) as well as custom objects in Salesforce.
Electronic signatures: Custom code forms can be designed to accept electronic signatures, which can be helpful for certain types of agreements or contracts.
Lightning-ready: Developers can build custom code forms to support Salesforce Lightning, the platform’s modern user interface.
Recaptcha support: Custom code forms can easily include Recaptcha to help protect against spam and bots.
Fast and accurate user experience: Code-based forms can be optimized for speed and accuracy, improving the overall user experience.
Customized design: Custom code forms can be designed to match the look and feel of your website or business.
Highly customizable: Custom code forms offer a high level of customization, allowing you to create or update any custom object, use dynamic picklists, and more.
No monthly/yearly cost: Custom code forms do not have any monthly or yearly subscription fees.
Secure: Custom code forms are considered the most secure way to create a web form in Salesforce.
No app installation required: There is no need to install any apps in Salesforce to create public forms using custom code.
Additional flow options: After form submission, custom code forms can be set up to create a PDF of the Salesforce record or send it to the visitor.
Drawbacks of using custom code forms in Salesforce:
Requires a developer: Custom code forms require a developer to create and maintain them.
Limited self-editing: Users may not be able to make significant changes to custom code forms on their own.
Third-Party Apps for Salesforce Form – No Code Method
There are many advantages to using third-party apps to build forms for salesforce. Perhaps the most obvious benefit is that it saves users from having to write code. But beyond that, third-party apps offer a variety of services and features that can make form-building easier and more efficient.
For example, many third-party apps offer pre-built form templates 💪 that can be customized to fit the needs of any project. This can be a huge 🤑💵 time-saver, as it eliminates the need to start from scratch. ➕ Additionally, many third-party apps offer drag-and-drop features that make it easy to add, delete, or rearrange fields. And finally, most third-party apps offer some degree of integration with other software.
Some features by which users can build forms without writing code:
- These apps use Salesforce API to push form data into Salesforce.
- Most of the time these apps are hosted on their own website, and users have to use these links directly or can be embedded into the website.
- There is monthly or yearly charges are associated with these apps
- It doesn’t require app installation in Salesforce.
- These apps collect all your form data into their own server.
Pros:
- Users can create as many forms as they want
- Easy to change and build without coding
Cons:
- You may need to hire a developer for the initial setup
- There are monthly charges
- Data may not be secure as it includes third-party interaction
When to choose an App-based approach for form:
- There is a need for a lot of forms, more than 20
- Changes in the form are frequent
- You are ready to compromise with speed and security
There are several apps that can be used to create forms in Salesforce, listed below :
Gravity Form
If you are using WordPress for your website, and want to push Data in Salesforce, Gravity form is one of the best solutions. This guide explains gravity form in more detail.
FormAssembly
If you already use Salesforce Experience Cloud to collaborate with customers and prospects. FormAssembly allows Salesforce users to embed their Salesforce-connected web forms directly into Salesforce Experience Cloud for a secure, integrated process. Check out how to use FormAssembly with Salesforce
AppExchange apps for Salesforce form – No code method
The Salesforce AppExchange is a great way for Salesforce users to find apps that fit their needs. With both free and paid options available, it’s easy to find the right solution for your needs.
You can search appexchange for web form apps by search ‘form’.
Some top apps on appexchange are:
- Titan – Salesforce Forms
- Youreka
- 123FormBuilder
- ProntoForms
Benefits of using custom code form over third-party apps
Well, all of these have their own benefits or limitations according to their features and specifications. but here we are talking about custom forms, and how the custom form is better than third-party apps/Tools in some use cases.
As below we have categorized some benefits of using custom forms over third-party apps :
In Salesforce, web Forms are generally made up of standard Web technologies like HTML, CSS, JavaScript, and Apex. Whereas HTML defines the web page content and CSS design the appearance of the various elements, JavaScript performs actions, and Apex is used in DML or SOQL operations. Using All of these technologies we can customize a web form for the best user experience.
- Custom code can fulfill all of the customer’s requirements in a very easy manner.
- Using custom design and CSS we can give the web forms a very attractive interface.
- The main advantage of custom code is that we can make enhancements or optimization in web forms based on requirements.
- Code-based forms are the fastest, most mobile responsive, and can have designed according to business themes.
| PARAMETER | CUSTOM CODE | FormAssembly | Gravity Form |
| Setup Cost | $250 – $500 (Based on the form) | $200 – $250 | $100-$250 |
| Subscription Cost (For 10 Users) | $0 | $890/Month | $259/Year |
| Speed | Fastest | Moderate | Moderate |
| Security | Most Secure (No external service) | Depends on Their Server | Moderate |
| Updates | Not Needed | Automatic | Automatic |
| Additional Software | Not Needed | Not Needed | WordPress |
Embed Salesforce web form in website
There are several ways to embed a web form in your website, depending on the platform or content management system (CMS) that you are using. Here are some quick steps for embedding a web form in popular platforms:
WordPress: In WordPress, create a new page or post and click the “Text” tab to switch to the HTML editor. Paste the embed code into the HTML editor and click “Publish” to save your changes.
Learn more: How to connect gravity forms to Salesforce in 8 steps
Drupal: In Drupal, you can create and manage your web forms by adding a form builder module to your website. Once you have installed and enabled the module, you can follow the module’s instructions to create and customize your form. Once the form is complete, you can copy the form’s HTML code and paste it into the page or block where you want the form to appear.
Custom HTML Site: In custom HTML website you can paste the code into the page or section of your website where you want the form to appear. Additionally add custom CSS and Javascript to make it look better.
Wix: In Wix, you can add an HTML element to any page or post by clicking the “Add” button and selecting the “HTML Code” option. Paste the form’s HTML code into the HTML element: Once you have added the HTML element to your Wix site, you can paste the form’s HTML code into the element’s code editor. You may also need to customize the code to ensure that it is properly displayed on your Wix site.
Squarespace: In Squarespace, you can add a Code Block to any page or post by clicking the “Add Block” button and selecting the “Code” option. Once you have added the Code Block to your Squarespace page, you can paste the form’s HTML code into the block’s code editor. You may also need to customize the code to ensure that it is properly displayed on your Squarespace site.
Tips for optimizing Salesforce web form design and user experience
Effective Form Layout
- Use a simple, clean layout that draws the eye to important fields and actions. Avoid clutter.
- Group related inputs together in sections with clear headings. For example, group contact details in one section.
- Arrange questions from general to more specific as you progress down the page.
- Limit form length by only including essential fields. Long forms are overwhelming.
Inputs and Labels
- Use specific, descriptive labels that clearly explain what data goes in each field.
- Set input types and formats to match the expected data. For example, email and phone number fields should configure data validation.
- Use select boxes or radio buttons for multiple choice questions instead of free text fields.
- Mark required fields visually with an asterisk to prevent missing data.
Calls to Action
- Use clear, benefit-driven language for form buttons over generic terms like “Submit”. Such as “Get My Free Trial” or “Sign Up To Learn More”.
- Make primary calls to action visually stand out through size, color, etc.
- Place buttons above-the-fold so users don’t need to scroll to complete the form. Top and bottom placement can also work.
In Summary
Salesforce web forms provide a flexible way to capture data from website visitors and sync it with your CRM. Key options include:
- Web-to-Lead forms that generate new lead records for sales prospecting and nurturing.
- Web-to-Case forms that create support tickets from customer service requests.
- Custom object forms to store submissions in any Salesforce database object.
You can build Salesforce web forms through custom code, third-party apps, or AppExchange listings – each approach having its own trade-offs. Custom code brings more security and control for developers. Simple no-code tools offer quick setup without technical skills.
Whatever approach you choose, properly designed web forms can become a vital asset for your Salesforce data and workflows. They provide fast, automated lead and case intake directly from your website traffic. With some creativity, you can craft web forms that serve almost any business need.
Do I need a developer to build Salesforce web forms?
You have code-free options like third-party apps, but a developer can provide more flexibility.
Can Salesforce web forms accept payments or donations?
Yes, third-party form apps allow integration with payment gateways like PayPal or Stripe.
What spam protection do Salesforce forms include?
Custom code and some third-parties allow CAPTCHA or reCAPTCHA for spam screening.
